Saturday, January 31, 2015

12 Kits of Ocassions with the Gingham Girl (Kelly)


Wow, I can't believe how long it's been since I made a card let alone had time to do this.  Boy, did I miss it, but Kelly (Gingham Girl) gave me a packet of her "Hello" kit.  Can't you just hear that old Seinfeld episode with "Helloooooo" LOL?  But this is truly an awesome kit!  All the great bright and happy papers, sunshine, embellishment dots, and the stamped images.  It's been such a cold winter here in Western New York that all of the goodies had me thinking that Spring would be right around the corner. 

Of course, I don't want to wish the time away as my first grandson just arrived on January 11, 2015 and I hope to spend a bit of time with him before he's all grown up!  I can't resist so here's a picture of the little boy Colton...gotta brag a bit.  His daddy is hoping he will be a hockey player too!


Aren't those crocheted skate and uniform awesome!  Ok enough bragging and on to what you really came to look at.

For my first card I wanted to try something clean and simple (not sure that it's that clean) and had in my mind those lovely balloons carrying up the "Hello" into the sky.   The Lawn Fawn collection(s) Kelly used are so amazing.  Maybe to be clean I should have left off the paper background that I cut from the Mama Elephant Peek a Frame creative cuts.  I just love that die set.  The balloons were attached to the string which then got attached to "Hello" so it could be lifted into the sky!  MFT Mixables sheer glitter glaze was used to give the balloons some glam.


I have so badly wanted to use the Arctic Penguin Stamps from Mama Elephant and so I did.  I tried to again go with a little simple design.  I stamped the penguin in MFT Black Licorice Ink and colored him in with some cool gray copic markers.  I die cut some squares thinking I would have the penguin coming out from the open spots but realized I really liked him and the gorgeous flowers Kelly provided on the solid squares and those clear Pretty Pink Posh sequins are just to die for.  Just a simple hello from the North Pole.


Love you Latte had to be included in this mix and I had so wanted to try my hand at another shaker card.  It's so hard to keep the acetate clear when your house is full of dogs and their hair!  Oh well, I think it's my second favorite next to the penguin.  I'm just so in love with those Pretty Pink Posh sequins!


Last but not least I couldn't resist using the sunshine, bottom bubble talk, and the precious birds.  I also used my stitched landscape dies to cut out the grass.  I think this one is the most springy of them all! 


Have you ever been afraid that mixing patterns and paper would be so awful looking?  Well, that's me.  I see so many people doing that and their designs are gorgeous.  So, my new New Years Resolution is to become more daring with mixing different papers and colors!

Hope you had fun with the 12 Kits of Occasions.  Thanks so much to Kelly for her generous kit!!!  Be sure to check out all of the Hello cards from the 12 Kit members here.  You can always head over to Facebook and  Pinterest for past kit ideas, TOO!

Monday, March 31, 2014

12 Kits of Ocassions


March 12 Kits of Occasions and I am thrilled to be a guest designer again!
Kelly Schirmer is the hostess for the month of March and asked if I would like to join in again for Spring Time fun.  Well, it's definitely anything but Spring in my neck of the woods but anything to help get the winter blues out of the system! I am ready for some sunny days with no snow and rain!  Come on Spring!

There were so many goodies in this kit and I couldn't figure out what I wanted to start with.  The bunny from L'ill Buddies by Waltzingmouse Stamps stole my eye so I hopped on to it (lol)!.  I colored the bunny with some gray copic markers and put some loopy yarn on for the tail.  I used Papertrey ink's in the meadow dies to cut out the grass in leaf green and striped leaf green.  Also used MFT's cloud die to cut out the Easter egg hunt saying.  Easter always reminds me of hunting for Easter eggs and finding the goodies hidden inside.  I also love Robin's Eggs so decided to splatter the sky on the Aqua Mist cardstock with some white, black, and navy acrylic paint.  Added some glitter around the cloud and the eggs. Hope you find some hidden eggs in your back yard too!


I was searching through Pintrest for some Spring inspiration and came across this.  Hmmm....wouldn't this be cute?  Well, I started it and ended up messing up the squiggly lines and the small hearts and butterflies.  So, rather than trashing it as a whole, I decided to fussy cut around it and added some of the houndstooth paper, pink bakers twine and the jillybean soup wooden etched button.  This is probably one of my favorites and I'll have to try again.  Somehow my images in my mind just don't happen on the paper when I get down to it.  spring design ideas


 I really wanted to use the Horizontal Striped Card Face and had an image of Navy and Red in my mind.  I was looking through the stash and found some red polka dot paper and loved how it looked through the slats.  I wanted to try something simple and without a ton of embellishments (I don't know when to stop) and used the Papertrey Ink Butterfly die, the MFT rectangle stax die to cut out the sentiment.  I decided that it still needed a little umph so I cut out some circles on navy paper from the Papertrey Ink movers and shakers die and used glossy accents all over them to give them some dimension.   Hmmm, maybe too much red,    


For my last card, I used the cream cardstock, antique linen distress ink, Waltzingmouse Stamps Harlequin border, and the embellished elements from Take Three Spring by Papertrey ink.  As I was in the middle of the Clean and Simple 3 Card Class I was trying my hand at lots of white card space and a clean look.  I think it turned out fairly well if I say so myself.


Take a look at all of the other great designs with this kit on the 12 Kits of Occasion blog here. There is also a complete list of supplies that were included in Kelly's kit.  Kelly, included so many great items that I'm going to keep on making Spring cards until the first day it hits 70 (Seriously, I'm hoping it's within the next week or two as I'll run out of supplies by then).

Happy Spring!!!!

Tuesday, March 25, 2014

Happy Anniversary and new technique


I recently signed up for Clean and Simple Online Card Class 3.  One of the first lessons they had was creating a Faux layered diecut to make a one layer card.  Oh, that's the one I had to try and it's really the only one out of 11 lessons that I've been able to accomplish.  Ok so it's not really layered but it is pretty cool how they lined up so easily LOL.

March-Blog-Hop-Inspiration
When I saw Papertrey Inks challenge for the month it was the perfect opportunity to create something using this technique with bright cardstock and some shiny accents.


It's also my parent's 49th wedding anniversary so perfect time to also give them a homemade treat from their favorite (only) daughter.

The chevron stripes and sentiment are from MFT Stamps but the paper is all Papertrey ink.  I really love their cardstock.  I used the chevron die and cut strips of individual colors and adhered them to some plain copy paper and pieced them into the card front.  I used another piece of cardstock on the inside of the card to hide the messy gluing I had done.  No one will notice now...

I'm so looking forward to trying the other techniques this class had to offer.  Also hoping these bright colors help to hurry Spring along.  It's still so cold here in Western NY.


Sunday, February 16, 2014

February Challenge with the Challenge Chicks


Well, I didn't have my card done in time for Valentines day, but at least with the sentiment it can be used any time as a special message.  I saw this deer on Cathy Weber's blog and fell in love with the deer.  It's from Fresh Squeezed stamps.  So many men in the family are avid hunters and I could just picture another deer head hanging on the living room walls. Good thing I'm a good sport lol.


Hope the man in my life likes this from his trophy wife!!

Saturday, November 30, 2013

The 12 Kits of Occassions


Kelly's Kreative Kit----


Take a look at this kit.  Isn't it just the greatest?  I was asked to be a guest with the 12 Kits of Occassions member Kelly Schirmer.   It is so exciting and such an honor to be a part of this month's kit.  Kelly really outdid herself with all of the color coordinating papers, ribbon, embellishments, and all of the chalkboard sentiments.  I fell in love with them and ended up using most of those in my images.


Of course many of these goodies came in red gingham bags which were so cute.  I saved mine and want to incorporate it into something else.

I couldn't decide where to start because I wanted to use every piece of this kit.  So, first I created a card using the Scotty dog image.  He became something really fun to use and I decided to glitz him up a bit by adding some red crystal embellishments as his collar.  I then fussy cut him out and popped him on a piece of ribbon and look at the matching paper.   The green sweater for him was too cute, love the argyle.  The sentiment was white embossed on black cardstock (like a chalkboard).


So, then I decided I wanted to do something clean and simple, which is never as easy as it looks.  Well I took one look at the white embossed christmas tree on black cardstock and decided black and white was the way to go!  So I layered black and white all the way.  I loved the way it looked and couldn't justify putting a sentiment on the front of the card so added one to the inside of the card.  I received some retro stamps free with my latest cardmaking and papercrafts magazine and loved the sentiment.  The first layer of white paper was embossed with Snowflakes.  Yay!


Now the next one was really easy as Kelly included lots of things to make tags.  The Spellbinders Opera Tag was diecut and stamped with a sentiment from Waltzingmouse stamps (sorry I don't know which set it's from).  There was also a gift card pocket from Memory Box and I tied the tag onto the pocket with red ribbon and viola!  A gift card holder and you can slide the tag front over to easily get out the wonderful gift card.  The one I have in there is from our local grocery store Wegman's which is a huge travel attraction, if you come to Western NY you'll have to check it out.  I can never walk out of there without grabbing things I never intended to.


Hang in there with me, I'm almost done. I really had to use this sentiment as it's one of my favorite Christmas Songs.  I can only ever remember the one line, but when I hear it, up goes the volume.  Drives my family crazy. 

 
Since it was so cold here today and I was outside for so long, I really wanted to warm up.   And the sentiment was exactly what I said when I got home. This stretchy snowflake sock was just what I was looking for to dress up this bottle and to add this cute little gift tag to it.  I used the square stax dies from My favorite things and added a snowflake to the corner.  Easy Peasy.
 
Last and not least I really, really, really, wanted to use the jingle bells that Kelly had packed into the kit.  Whenever someone opens this card, they'll jingle all the way!


The snowman is from Tremendous Treats by Paper Trey Ink and the chalkboard frame is from My Favorite Things Stamps. I also used a candy button and popped up the snowman and jingle sentiment with foam tape.  The snowman was colored with Copics.  I just completed a class and have been practicing, practicing, practicing.  I love using a white gel pen to make the dots on the scarf and hat.
 
I have so many things left, that I can't wait to use from Kelly's kit. She is hosting a prize giveaway this month! Leave a comment on the 12 Kits of Occasions blog Here for your chance to win the Echo Park 6 x 6 Tis The Season Paper Pad !    You have until December 5th at 11:59 P.M.  to leave your comment. You will also see the blog links for all of the kit team members, as well as a supply list for Kelly's kit.
 
Thanks so much to Kelly for asking me to be her guest with this lovely kit! Don't forget to check out their Pinterest Board HERE and the Facebook page HERE for more 12 Kits inspiration!
 
Hope you enjoyed visiting today and thanks for stopping by.  


Wednesday, October 9, 2013

Wow, it's October already!


Hi everyone.  Can you believe it's only two more months until the holidays?  It seems like summer was never here, of course in Western NY, it's usually short lived anyway, It's been busy the last couple of months as I had my son's wedding at the end of September.  Now that the wedding went off without a hitch, it's time to get back to some crafting.

Not sure what I was thinking when I offered to host a month for the Christmas Card Challenge as I'm quite a newby at this but what does it hurt.  All for fun and having lots of cards to send out in December will make it all worthwhile.

So here's what I came up with for a challenge this month.  Let's go for a Whimsical Card.  When I thought of whimsical, the first thing I thought of was a Snowman on a beach with palm trees and a surf board.  Coming from a snowy state a beachy holiday is not anything I see.

Join me in the challenge here and have fun with it. I can't wait to see how whimsical and silly we can all be this month!

Sunday, September 1, 2013

Waltzingmouse Pajama Party


Have a quick second to get this card uploaded before I have to leave. Needless to say it wasn't a pajama party for me as I didn't stay up all night.

However, I love the new rope and nautical sets that Waltzingmouse released last month and had purchased one and borrowed another. 

I went for a framed masterpiece and used the rope for the frame border.  Plus it's nautical so I will use it for two of the challenges. 

Sunday, April 28, 2013

WMS CASE Flower Show card #2


I created my first card last week and have been thinking that I wanted to have another go with a different card to case.

So, first I figured out that I wanted to use the 2011 Holiday Ornaments because I had this vision that I could turn the ornament into a "tulip" like flower.  After I stamped the ornament and clear embossed it, I cut it out sort of along the center to create the two outer petals of the tulip.  The with some glossy accents I stuck the petals on and then trimmed it down to my liking.  Not a perfect tulip, but I like the way it looks.

With that done, I decided I would CASE (Copy and Share Everything) Debbie Olson, you can find her card here.   I loved looking through her blog!  Here's a picture of her card.

WM_Cp_Sp_DO3a

She did some sewing and coloring with Copic Markers, but I stuck with straight stamping and using a white colored pencil to do my sewing...I'm not good with needles or thread of any kind. 

Here's the card I created and you could maybe use it even for Christmas...yikes it has even warmed up and I'm saying that word.  Although I think I'm going to use it for Mothers day.


Supplies:  PTI paper, Memento Black Ink, Versamark, SU Cherry Cobbler, clear embossing powder.  Stamps, Sewing Box Christmas, 2011 Holiday Ornaments, Compact Sentiments Part II, Compact Sentiments Family, red ribbon, white colored pencil. Spellbinders die.

Tuesday, April 23, 2013

WMS Flower Show Competition


Claire has come up with another amazing challenge, where does she find the time to get so creative?    To get more details and participate in this challenge please click here. 

It took me looking at the special guest designers over and over to finally decide on a project that I wanted to "CASE" (Copy and steal everything).  Never knew what CASE stood for before and love the concept.  I really like the new look of a blackboard so fell in love with Kimberly Crawford's card that she created for this project.  I knew I wouldn't be able to copy every single detail as I don't have the folk art medallion set (YET).  It's on my list with soooo many others (did you know Mothers Day is coming soon, hint hint to my family).

Here is a snapshot of the card Kimberly created and the link to her great  blog:


So for my take on the card I went with My Heart, Earth Angel, and Sewing Box Hugs.  I just love the versatility of all the Waltzingmouse Stamps.  I tried to get the blackboard to look like the chalk had been erased but may have went a little overboard.  Still I like the way it turned out and here's a Mothers Day Card down.  Woo Hoo!!


I stamped the border with the border stamp from My Heart, the sentiment was from Earth Angel, and the hearts were from Sewing Box Hugs.  I stamped all with versamark ink and embossed them with Martha Stewart dove embossing powder.  Next, I used the mini rose die from My Favorite Things and cut it out twice.  Wrapped one around the other to get an even bigger rose...I love how it turned out.  The leaves were cut with MFT Leaves die.  A bit of glossy accents was then used to hold it all together.  The cute flower paper is from Little Yellow Bicycle "Splash".  I used heart brads to help the border look a bit like flowers and to hopefully tie the heart theme together.   Snow Cap White distress paint was added to try and create some reality to the chalkboard (think I went a little overboard).  And last but not least, I popped the blackboard up with foam dimensionals and adhered it to some pretty yellow card stock.
 
Hope you had as much fun as I did with this challenge.  Now I really have Spring fever and it has not been that warm in the Northeast yet!  Here's hoping all the flowers will help the sunshine through.


Sunday, February 10, 2013

Sketch Challenge for Papertrey 6 year Anniversary


I decided to play along with a sketch challenge for Papertrey Ink's 6th anniversary.  There were 5 sketch's to be chosen from and I decided to use sketch 5 and create a clean and simple card.

Sketch-5

I decided I would stick with the Christmas Holiday theme as I was working on the WMSC Christmas challenge too.  I used Tag-Its #9 and the sentiment from Tremendous Treats: Christmas Stamp Set.  I stamped the leaves across the bottom of vintage cream card stock in SU Garden Green, then stamped the sentiment in SU Cherry Cobbler and clear embossed it.  Next I just added some red stickles to create the berries amongst the leaves. 

This is the first clean and simple card I didn't go overboard on.  Hope you like it as much as I do.

A Great Challenge for Christmas Cards in February!


This months theme for the Waltzingmouse Christmas Card Challenge is to incorporate hearts into our Christmas Cards.  Feel free to play along with us, you can find the information here.  I've already got 4 cards down and by December who knows how many will be hidden away in my stash (hope I can find them LOL)!

Well, I wasn't sure how I wanted to create something with this and decided because I love snowmen so much that why not use him and show the love to some old friends.  Hope it melts your hearts like mine! 


I hope the picture turns out OK, I had to send my camera in for servicing after our trip last month and hope it's fixed soon.


Supplies used:
Waltzingmouse Stamps:  Sewing Box Christmas and Sewing Box Hugs.
Miscellaneous Paper, twine and buttons, Sizzix Snowflake Embossing Folder.

Sunday, February 3, 2013

DIY Washi Tape Monday Make Challenge


You can find information regarding this challenge at Waltzingmouse Stamps Blog.  There is also another challenge for February coming up that entails the use of doilies.  Hmm, so many things you could do with those.  I have so many ideas in my head, I don't know where to start.

Well, going to try my hand at making some washi tape using masking tape.  I really liked using distress ink on the tissue paper.  I tried my copics, but didn't think the color was vibrant enough.  I wanted to use bright yellow, flowers and butterfiles because I'm so ready for Spring.  After a 10 day vacation in the Southern Carribean, it feels really cold back home.  Why couldn't I have stayed for the winter, oh yeah, who would support that habit let alone my crafting habits.

If you'd like to try your hand at this, visit the Waltzingmouse blog for some great insturctions.
 http://waltzingmouse.blogspot.com/.  There's plenty of other great information there as well.

I tried making a few different pieces and liked the one that is framing the top and bottom of this card the best.  I used squeezed lemonade to color the tissue paper, then stamped from the heirloom patterns stamps in pacific blue, and stamped the solid hearts in the circle using Earth Angel and poppy red.

I couldn't decide if I wanted to use the angel or not and decided to go with the butterflies as they are easier for me to color for some reason.  I used one wing and stamped it twice slightly overlapping to make the butterflies look like they were flying.  Then colored them in with copices and sprayed them with Goosebumps. 

I used the flower stamps from Papertrey Ink as it was solid colored and stamping different colors worked for me.  I stamped them across the center of the card and ended with the Happy Birthday greeting also from Earth Angel.  I outlined the flowers with a glue pen and added some sparkle with glitter!  They make them pop out a bit more.

One birthday card down, next a christmas card, then valentines day, boy am I going to be busy.


Supplies Used:

Stamps:  Waltzingmouse Heirloom Patterns, Earth Angel.  Papertrey Ink, Flower Fusion #6.
Ink:  SU Poppy Red, Pacific Blue.  Tim Holtz Distress ink Squeezed Lemondae. Amuse Studio inks, bubblegum and apricot
Paper:  Papertrey Ink, Vintage Cream, Lemon Tart  and Blue Doily from My Minds Eye.
Miscellaneous:  Yellow button from MFT, adhesive dots and rhinestone, goosebump texture spray, foam dimensionals. 

Thursday, January 10, 2013

Christmas in January or February or March?


There is a challenge that has been continued  at Waltzingmouse Stamps to create a Christmas Card every month.  Each month one of the host's will issue a challenge on what technique, layout, color, etc. to use.  I think this really helps get the creative juices flowing and gives us all a huge jump on getting a head start on next years cards.  I for one could use all the help.  I participated in a card exchange this past Christmas and that was the ONLY card I sent.  My hubby wondered why I did that but didn't send any others out to family and friends.  Of course my reply was, because this is fun and you get to correspond with new people.  So, this will hopefully help get a head start and I can mail cards to family and friends in 2013! 

Here is some additional information regarding the challenge:  If you'd like to see more feel free to hop on over to http://www.waltzingmousestamps.com/ and join the forum.  There's plenty of other great information there as well!

This months challenge is a Sketch Challenge designed by very talented Anya.   I thought this looked pretty simple, but my projects never end up that way.  Here's my creation(s) based on the sketch, yes, I had to do two as I thought this first one was a little over the top.


Candy Canes are my favorite candies at Christmas time.  I love the mint and sweetness to them and enjoy them way into February (I buy lots of them after Christmas when they are on sale).  I thought the Papertrey Ink Pillow Box Die matched the shape in Anya's card and thought I'd make my own candy bowl that I could drool over (LOL).  Recently I say Kelly Schirmer color in her candy canes with Stickles and loved the look so I copied the technique for my candy canes and love the way they turned out.

Supplies Used:
Stamps:  Waltzingmouse Sewing Box Christmas, Candy Jar Christmas
Dies:  Papertrey Ink Pillow Box Die, MFT Chevron Stripe, MFT Sentiment Strips
Misc:  Ribbon, Mambi Paper, Papertrey ink white, leaf green patterned paper, Green Felt, Red and Crystal Stickles, Red Buttons, and Glitter.

Then I decided I'd try to find a shape that was more similar to the sketch and came up with this version.  It was a lot simpler to complete and I like the way the harlequin and stamping makes this look like a wrapped present.  So it finished it off with more ribbon and a bow. Too bad there's nothing inside, but wait maybe it could be a gift card holder, oh the possibilities are endless. 


I started out with the coverplate and used the cut out shapes from the Scarlet Jewel and Leaf Green patterned paper.  I didn't want to fill the whole card in as I wanted a few stripe lines that I could stamp in between.   Then I took a strip of paper and cut the fishtails out and folded it to look like a banner and added some bling, always need some bling.   

Supplies Used:

Paper:  Papertrey ink Vintage Cream, Scarlet Jewel, Scarlet Jewel and Leaf Green patterned paper
Dies:  Spellbinders label, Papertrey ink Harlequin cover plate
Stamps:  Waltzingmouse Sewing Box Christmas Snowflake, A Cottage Christmas.
Ink:  SU Sahara Sand, Memento Black
Miscellaneous:  Green Ribbon, Red embellishments

I hope this gives you some inspiration to start playing along with us!

Thursday, January 3, 2013

2012 Holiday Card Exchange


For this holiday season, I was so excited to be able to participate in a holiday card exchange that was arranged by Cathy Weber via Waltzingmouse Stamps Forum.

It was the first time I participated and hope that it continues to be a yearly tradition.  It's so much fun to make a card and send it to someone you may or may not know to make new connections, friends, pen-pals, etc.

The card I received was from Renee Lynch. I love the colors and the fancy borders on this card.  Plus the extra special bling on the holly.  Renee also included some bling in the card and it was an extra surprise to find!  Thanks Renee!  I hope you had a wonderful holiday and may 2013 bring you many fine memories! 


It was decided that we would take pictures of the cards we made and sent to our designated recipient in the event that they weren't able to upload an image.

I created a special greeting for  Joyce M in Cardiff, CA.  The snowman on this card was created without his hat as I didn't think he'd be that cold in CA.  I hope that Myrna had a wonderful holiday and a happy new year!  Below is the card I created.  I hope everyone had a wonderful holiday season!!


I was hoping the pictures came out better, but you can still get the drift (LOL)!


Friday, November 23, 2012

Waltzingmouse sketch challenge 124

As usual, we have another great inspirational sketch  for you today. This week we have a sketch, created by our Mischief Maker, Karin Ã…kesdotter.  As you can see from the Mischief Makers’ and Design Team samples, there are many interpretations of the sketch. Set your mojo free and go with the flow.


WMSC124

I whipped this one up for my wonderful Mother-in law's birthday.  She is truly one special lady who we are thankful to have still with us.  Two years ago she had a heart attack on Thanksgiving day.  It's been so busy I didn't write down everything I used, but most of it was from My Favority Things, Waltzingmouse Stamps, and Papertrey ink. 


Thursday, November 1, 2012

As usual, we have another great inspirational sketch  for you today. This week we have a sketch, created by our Mischief Maker, Jeanne Jachna. Feel free to follow your creative mojo and interpret the sketch by flipping or rotating the design.  As you can see from the Mischief Makers’ and Design Team samples, there are many interpretations of the sketch. Set your mojo free and go with the flow.


WMSC121


I thought this would be fairly quick to put together....well, that wasn't the case.  I kept changing my mind about what I wanted to add to my card or not.  It's much harder than I thought.  Luckily, we didn't have many affects from that nasty old "Sandy" so I could still work under lights and not by candle light.  I decided to start with a Christmas Card so I had some ready to fill with the customary "moolah".


I used the PTI Cover Plate Harlequin Die to cut out the harlequin shapes from the two patterned papers and pinefeather.  The leftover open plate made the perfect template and I arranged the harlequins the way the pattern appealed to me.  Stamped the pinefeather ones with the snowflakes from A country cottage christmas and embossed with Martha Stewart dove embossing powder.  Added ric rac down the center to try and make it look like two separate panels and embellished with some buttons.  Stamped the ornament with versamagic and used the WOW embossing powder to make it shine!  I didn't use the die to cut the ornament out as I had already embossed it before the brain remembered I had those.  Used an oval stax die from My Favorite Things and stamped with the sentiment Joy from Say It Loud Winter.  Had some left over holly leaves so I added them and the gold string to hold the ornament.  Propped them both up with dimensionals.  I was going for a fairly simple look, but I always add more than I thought.  Hope it's a "Joy" to look at!

 Supplies Used:
PTI:  Holly Jolly Die, Pinefeather Paper, Harlequin Cover Plate Die 
Waltzingmouse Stamps: 2011 Holiday Ornaments, Say it Loud Winter Holiday, A Cottage Christmas.
Miscellaneous Supplies:  WOW embossing powder, SU Cherry Cobbler Ink, Versa Magic Stamp Pad, buttons, twine, ric rac, gems, photo mat stack paper, my minds eye, Martha Stewart Dove embossing powder, My Favorite Things Oval Stax.

Thursday, June 7, 2012

Dynamic Duo Challenge #5

Welcome to the Dynamic Duos Challenge Blog. Each week we will have two colours for you to use to create a card, scrapbook page, craft or digital project.  Only the two colours, otherwise known as "The Dynamic Duo", may be used for your project.  Neutrals such as black, white, vanilla, skin colours and kraft are also welcome.
 
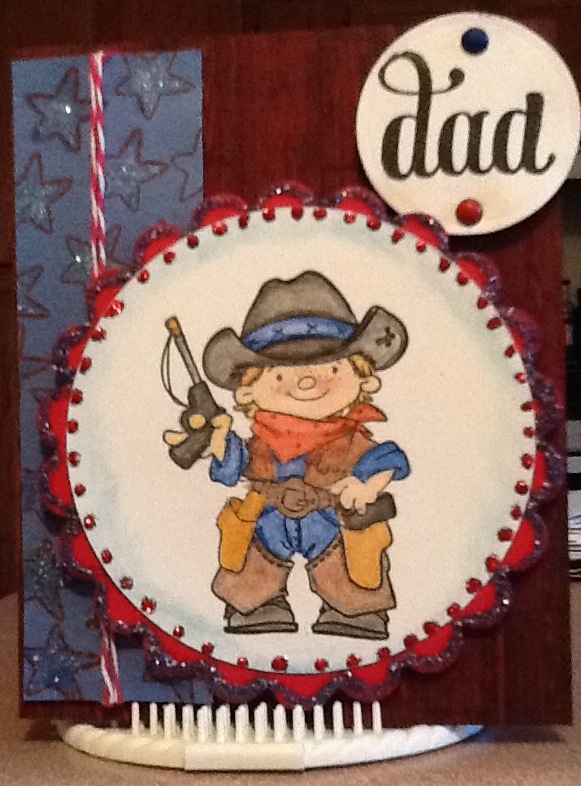
And here's my entry for this week.  It is so hard to create a masculine card but wanted to try one to use for Father's day.  It is only a week away!
 
I need to remember to write down all the supplies in order to include here.  These challenges have been great!  Thank you Dynamic Duos!!

Tuesday, May 29, 2012

Dynamic Duo Challenge

Wanted to try my hand at the dynamic duo challenge.  You can find here http://thedynamicduoschallenge.blogspot.com/  Easier to start and use two colors other than three.  So I tried to make an anniversary card for my in-laws.  It's their 50th wedding anniversary and it doesn't seem possible that I've known them for over half their marriage now.  I think it's truly amazing to be married that long!!  Congratulations mom and dad (not that they even know I have this blog). 

I thought the card came out ok, but I probably should have left well enough alone and skipped the glitter.  Oh well, thought it would add some sparkle to their magical day.  Guess I can always make a second one...seems like I get almost done and then mess it up.  Something got stuck to the bottom and the nestie creased at the top.  UGHHHH!!


Anniversary Card


Wednesday, May 9, 2012

Waltzingmouse Sketch Challenge

Challenge #96

We have another great sketch created by our own Mischief Maker, Kelly Schirmer.  We hope that you will follow your creative mojo and interpret the sketch as you see fit. Feel free to flip or rotate the sketch.  As you can see from the Mischief Makers’ samples, there are many interpretations of the sketch. Set your mojo free and go with the flow.

WMSC96

When I first looked at this, all I could imagine was a paw print.  I really don't know why, but I couldn't think of anything to make the paw print work for me.  Plus it's almost mothers day so I had to get a couple of cards done. 

Here's my interpretation of this fun sketch.  Excuse the slight blurriness of the pictures.  I haven't quite figure out how to get them as clear as most others do.

I tried to use the standard of three to bring the colors together.  Pink, Blue, Cream and a little bit of green.  I'm going to try and play along with color challenges.  That seems to be where I struggle to come up with a good combination.  Plus I start out with something in mind and it changes about a dozen times before I complete a project.  I need to stop thinking so hard and just go with it. 

If you know of any good videos, tutorials or challenges that might help let me know!  I'm always drooling over the gorgeous cards others make.


Supplies: 
Waltzingmouse stamps:  Compact Sentiments
PTI:  Seed packet frame die, flower fusion #6 die, Leafy vine border, vintage cream paper, raspberry fizz paper, enchanted evening paper, raspberry fizz ink.
MFT:  Button die
Miscellaneous:  White ribbon, light green paper, Versamark ink, small flower stamp by stampin up.

Not part of a challenge, but here's the second card I tried to just throw together.  Maybe a different color ribbon would have been better, but this one only took half the time of the other to do.  Again, please excuse the blurriness of the words. I am not a great picture taker (can you tell).


Thursday, March 15, 2012

Waltzingmouse Sketch Challenge 88

Here's a great sketch that I thought would be quick and fun to do.

We have another great sketch designed by our own Mischief Maker, Renee Lynch.  Feel free to turn or flip the sketch - just use the basic principals of this sketch in your design.  Set your mojo free and go with the flow.
WMS Sketches_MS font_separate

Well, quick turned into a bit longer than I thought.  I get these images of what I want to try and do in my head, but it just doesn't come out on paper that way.  So, I tried to go with something simple...yeah ok.  What in my world is ever simple.  This also quite a bit larger than I thought it would be so that I could fit it all in.  Hope you like it.  (P.S. figured I get the Christmas Challenge started, two birds with one card LOL)


I used images from Sewing Box Christmas to stamp on the white PTI cardstock, then stamped the white snowflakes on more Tim Holtz distressed paper.  The diamonds were created using the Frame It 1 die from PTI and popped up with dimensionals.  The sentiment is from Say It Loud Winter (I just love how big the words are).

I'm so glad that I found Waltzingmouse through a friend, I really love the products.

Till next time....it's in the 60's here so it's hard to keep thinking about Christmas.  Who would have thought in Mid March it would feel like May weather in upstate NY.  Hope it's nice out wherever you may be!